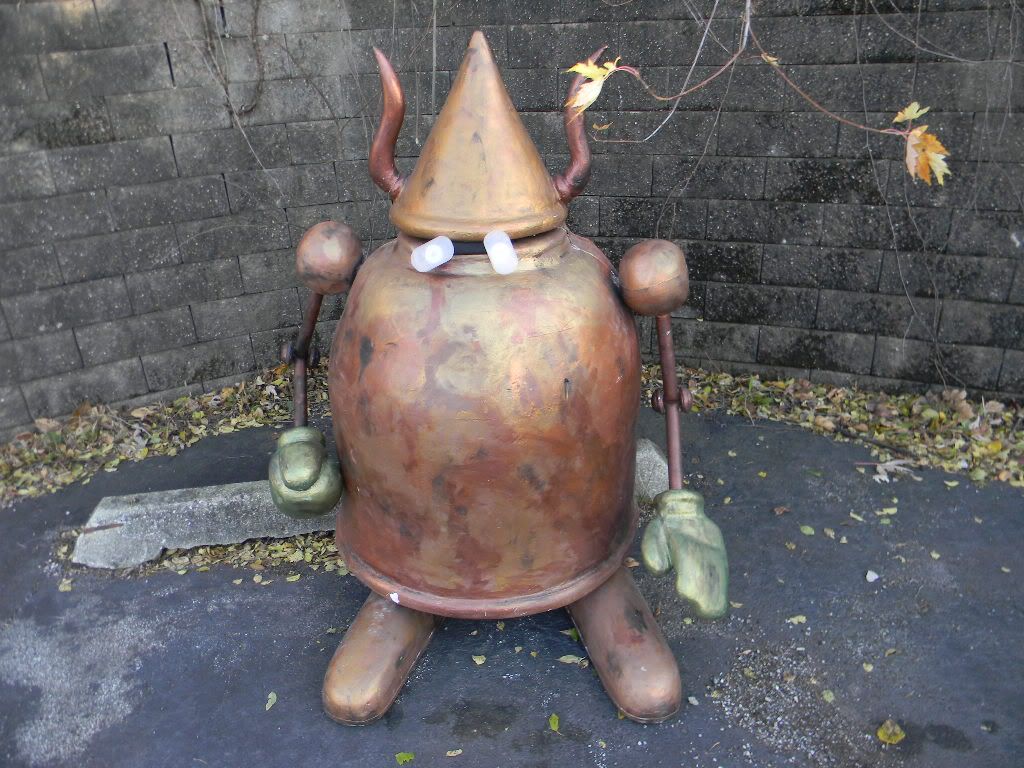
This was an interesting costume that I chose to start on four days before Youmacon. It’s from one of my favorite games, the Legend of Mana. Thankfully I already had schematics ready for this costume, The only reason that I was able to finish this cosplay in time for the con was because I had plans already in place and I knew what I wanted to do and how I wanted to execute the cosplay. If you are interested in looking at the videos corresponding to the creation of this prop, please go to the following link.
To lay the groundwork for this costume, I started with circles of foam stacked on top of each other. Think of how onion rings are stacked up when they’re brought out to you at a restaurant and you’ll get the idea. The trick with foam is to use it as effectively as you can with circles and compound tape. When you remove cavities from the foam, keep them and use that foam for other exposed sections. If you were to make a circle, you could cut a run and then stack another ring on top of the ring before it to make layers stack together.
You’ll want to start with two circles. One will need to be smaller than the other so that you can stagger then properly. Think about how you give a baby a bunch of different sized circles and then teach them to stack them into a cone shape. When you cut your circles, make sure you are CAREFUL about the THICKNESS of the circle. If you cut your circles too thin from the foam it will make one side either weaker or make it weird when gluing. If you cut it too thick it will be too hard for you to move in the actual costume. I usually say that you need a 2 inch minimum for EPS foam. If you opt to use another kind of foam you will need to mess around with what thickness will be the most ideal.
There’s a variety of ways I chose to draw my circles. If the circles are going to be relatively small, I’ll use plates. Since I needed really large circles for this prop since it was going to be going around my body, I constructed a compass. Basically, you’ll need to create an axis and then create a method to be able to pivot around that axis. I took a ruler and measured out what I wanted the diameter and the radius of the circle to be. After I determined where I wanted the center of the circle to be and how big the radius and diameter was and marked those, I took the compass and stuck the pointy end in the foam where the center of the circle would be and took a marker and spun it around to hit all the points I made measuring out the radius from the center of the circle. If you cut out a center piece you can take that piece and use that hole for the center of the next layer so it makes the same circle every time. This is extremely important when you’re doing multiple circles. If your circles are off center you can have lots of missed spots and it becomes problematic.
Before you glue these layers together with these hard edges you will want to cut the basic shape of the prop. Instead of cutting out the big edges after you glue everything together you will have the basic shape. I like to stack the layers all together, draw where I will need to cut, then cut out the foam so it will be in the shape I need it for after it’s glued together. It’s easier to cut a two inch wedge than huge chunks of foam glued together. However, doing this can lead to some issues, so make sure you don’t cut too deeply in case something goes wrong during gluing.
As a side note, it is not good to combine different kinds of foam. Spray foam will eat EPS foam. DO NOT try to patch holes in EPS foam with spray foam. I choose to use EPS foam because it’s way cheaper by volume. Spray foam is usually full of cavities and useless. It’s good for putting things together fast but you often lose time by filling all the holes that spray foam has. Finishing spray foam also takes lot longer because of how coarse it is. Whatever you do, if you choose one kind of foam stick with it.
Once you had your basic shape cut out and glued together you can get a decent sanding tool and go in to start shaping. Since foam is really soft you don’t need a super hard tool. When you’re sanding you need to be careful of the layer lines. Unless you’re using a huge block of foam you will getting stuck with sanding many layers. You’ll need to mask them as well as you can otherwise you’ll be able to see the rings when you paint. The spray adhesive is denser than the foam itself so lines can be evident even if you sand everything smoothly. You need to get the rings out later, so you don’t have to get it perfect for now. You can sand it again after you use the plaster of paris.
After that, you’ll need to start working with the PVC pipes to work in the arms. I created a PVC pipe bearing. You can easily make your own with two pieces of pipe that fit together well. You will want to cut a small piece of the 1.25 inch PVC to protect the costume. After that, cut the 1 inch PVC pipe so that it can rotate in the 1.25 inch pipe. You need to be careful with this because if you just used plain pvc pipe you could wear away the joint very easily. Even if you use plaster of paris to reinforce the joint it will still crack away over time and it won’t last very long.
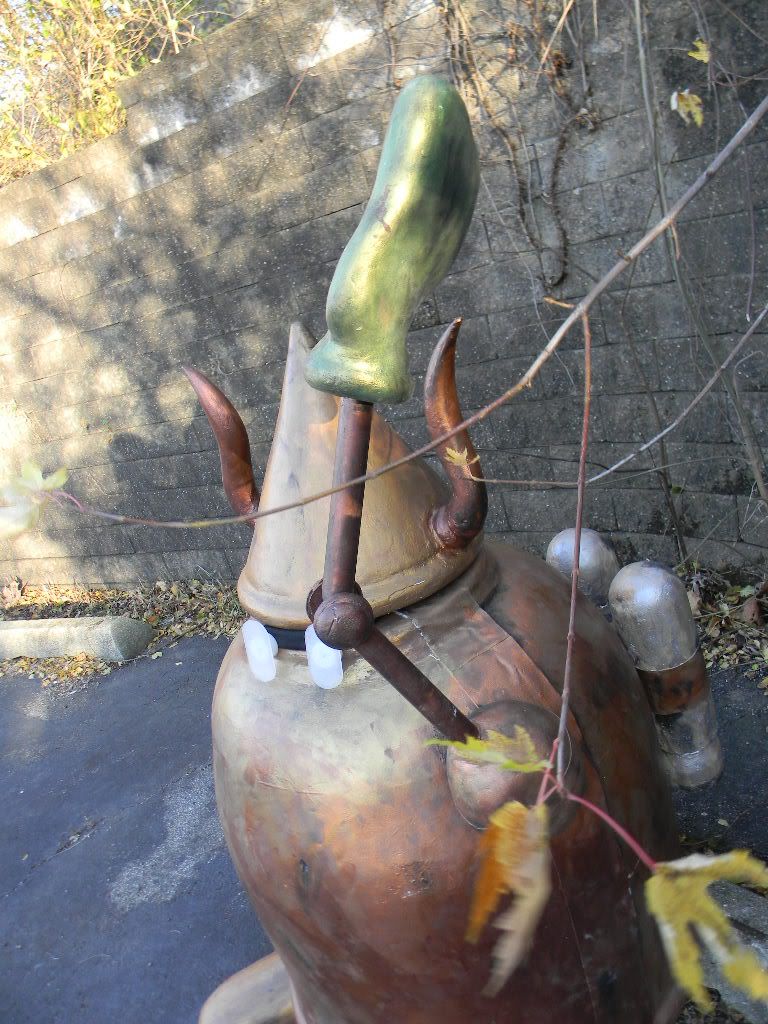
Since the cosplay allows for a lot of space I was able to make the body huge and cavernous. As such, I was able to keep my arms inside the costume and didn’t have to have them coming out of it. Since that was the case, I put in puppet arms to make the costume look more in character. It was pretty easy to do. All you need is a pipe with decorative bits with foam decorative bits and some PVC bearings. I decided that heat shaping the PVC pipe for the arms was the best because it was cheaper and was easier to do since you wouldn’t need to install a bunch of joints. For this type of bend you want to heat it evenly and completely over the entire outside surface of the pipe. You want to get it right the first time. If you have to do it multiple times you make the bend in the PVC weaker every time. Heat up the PVC and then press the inner edge in to how much you want it bent. Then you will need to wait for it to cool. The outer edge will solidify and be a bit stronger than the inside edge. If you don’t do it right, the inside will start to crack, especially if you keep on bending it in and out.
If you look at the videos, I would actually cover the feet now. However, I have chosen to finish the arms first in the blog post. In order to start with the fist, I cut the basic shape out of foam then glued the layers together like how we did the main body part. I drew the idea of what I wanted the fist to look like onto the surface of the foam with marker. Since you’re carving out something out of a block you need to envision what’s inside and slowly work your way in. The best way is to start with the most exposed parts of the glove and then keep on working in. I found that it was the best to find was the thumb and the knuckle before I started to work in other details after that very slowly, sanding and shaping the foam to get the hand that I wanted.
In order to support all the foam that was glued together to make the hand I used huge foot long shish kabab skewers to laterally link all the foam together. That way, if the glue isn’t gluing properly together, all the skewers are going to be holding it together. It provides additional support and ensures that everything will stay together. I put a shish kebab skewer every three inches. One of the hands required a curve and for that one I inserted even more skewers to make sure the prop stayed together. The hands didn’t need crossbracing. Just inserting the skewers were enough.
In order to put the fist on, you will need to create a hole to jam over the pipe. If you jam just the foam on over the pipe you will be dependent on just friction to hold the foam over the pipe. I took plaster of paris and threw it into the hole that was in the foam before I sprayed insulation 78 on the pipe and jammed it all together to make sure that it stuck and held well.
I also had to make the small elbow pieces out of foam. I screwed a PVC disk onto the elbow and then glued the foam to the PVC Disk (PVC will take screws but foam will not). As such, I used the small PVC disk as a transfer to hold the foam in place.
Now I progressed to the feet. One of my hard rules is to make sure you wear comfortable shoes! You’ll be walking a lot in these cosplays and it does your body no good to be walking in uncomfortable shoes for long periods of time. Also, for these shoes, I needed to do some foam parts. These big foam parts are prone to snapping off if you don’t reinforce them.
To start these I made a shoe print out of wood. After that, I took a pair of my comfortable shoes and screwed the shoe into the wood at the toe and the heel. Note that if you use wood, it can be really hard to walk around on concrete, tile, or other hard surfaces since the wood is so smooth. To give the shoes some friction, I chose to layer the very bottom of the wooden shoe portion in cardboard since it is easily replaceable, cheap, and would provide some kind of friction. You can also use foamies or other soft and pliable materials for the shoe. Having friction really helps you to get around, especially if you’re walking in clunky shoes.
Note, foam doesn’t glue well to wood. To make it stronger on the foot I put wonderflex around the bottom edge of the shoe (since wonderflex sticks to most stuff). You will want to stick the wonderflex on before the plaster of paris. Wonderflex sticks better to porus surfaces and it sticks onto wood because of the grain. If you have a nicely waxed wood it won’t stick as well.
After you put on the wondrflex and the foam, you will want to use a lot of plaster of paris to cover of the shoe and to fill in the holes of the foam before you start sanding. Now you can get rid of the layer rings. You can plaster of paris the entire surface before sand down the rings that you can see so that you will be able to hide the pieces. When you’re using plaster of paris you need to store it well when you are not using it. I like keeping it in a water container. If the brush hits the air it hardens and then you need a new brush. I use my hand, brush, and a spackle tool. There are a number of ways to get it on. After you finish sanding it, you’ll want to coat it to make it stronger.
Next I progressed to the horns that jolt out from the side of the head. They are very easily broken and are very important to the costume. I had to do a lot of crossbracing in these horns to make sure that they didn’t go anywhere since they were so easily broken. The glue wasn’t going to hold well to the horns either, given how pointed and narrow they were. I used approximately 5 skewers in each horn to ensure that they weren’t going to break and worked primarily with foam because it is good at giving textures and gives a different feel to the final product.
In order to shape the foam for the horns, I opted to use a hot knives. AS A NOTE, HOT KNIVES ARE VERY DANGEROUS. BE VERY CAREFUL. A handy tool to have around for foam is a pumpkin carving tool. There are saws called foam saws and they come to a really sharp point. They allow you to puncture through the foam without killing a huge surface area. Pumpkin carving knives are smaller than foam saws and do the same thing. They are great for precision cuts and are pretty cheap, especially after Halloween.
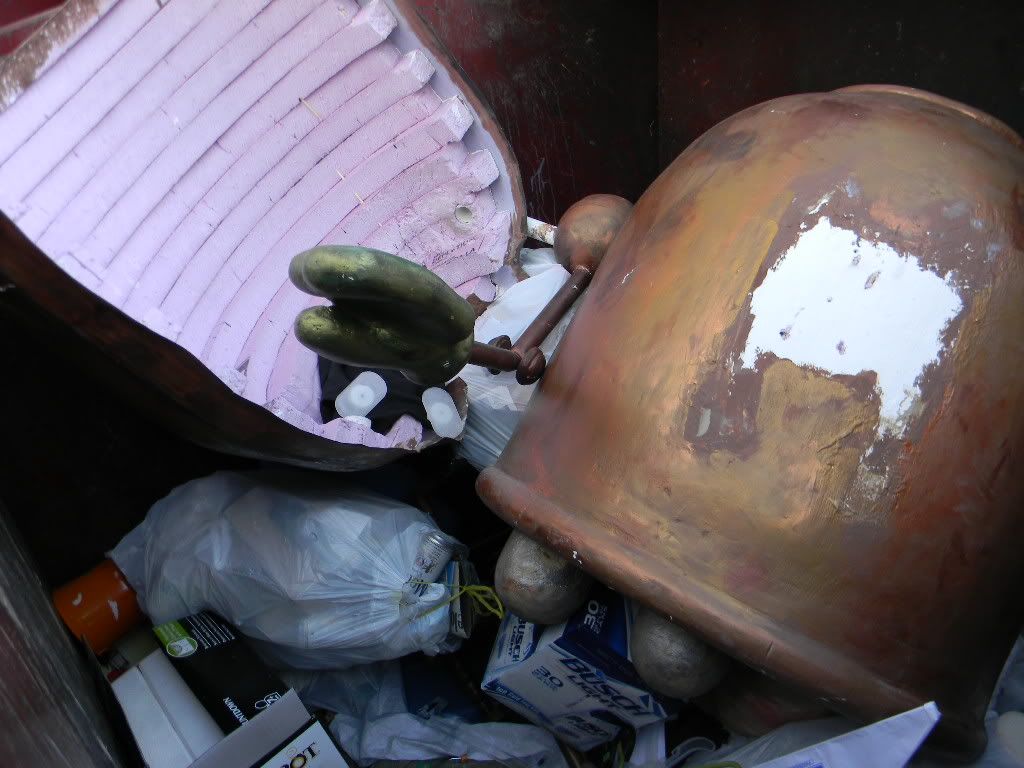
We ran into an issue with transporting it so we cut it in half. However, cutting it straight in half would be bad for holding it together so I cut it in a zig zag pattern so there would be more surface area. In addition, I could add a skewer to the cosplay straight through the zigzags to hold it in place at the con.
With this all being done, it was time to paint the piece. Since I only did it a few days before the convention there was no time to nitpick on details. I opted for this cosplay because it is steampunk based and the genre allows you to kind of mess around with how smooth and polished it looks. Steampunk is basically just metal all around so I chose to use a metallic paint. In order to paint with a metallic paint you will need a base. The fists were green so I started with a green base before I painted with a metallic green. I used around three bottles of brown paint to cover the main part of the cosplay before I started to work on the gold metallic color. I wanted to have a non-uniform tone so I used three different kinds of gold and copper metallic and worked them in layer by layer. While this sounds like a lot of work it really isn’t. You’ll mainly be plopping it on and mixing it with your hand to get the creases in. After you complete the metallic coating you will want to get the colors you want for oil and strategically degrade the paint job. If you have cracks in places that you want to emphasize, get a wash and cover that section in it so that it will bring out the imperfections. The flaw is built into the character of the costume.
Note, when you are painting the PVC Pipe be sure to sand it before you paint or the paint will come right of.
I also did some bits of decorative wonderflex work before I painted. You would typically put wonderflex on before plaster of paris but since it is decorative the detail has to be undamaged so it needs to go after the plaster of paris. Since it is only decorative it isn’t holding any weight so it doesn’t matter if it isn’t as strongly structured.
I totally didn’t treat this costume well at all. It needs to be repaired. For the damaged wonderflex, I I have to do is just heat it back up and put it back on. Since it is a steampunk costume, all I did was just took dirty colors and made it part of the character. There is some thought you need to put into mud and oil. If you blotch it on it can look ok but if you put it on like how it might have happened in real life (like how oil might leak from a crack) it looks more realistic. I had layers that I sheared apart just enough to damage the paint job. To hide that you need to take a heavier paint and work it in there or else it will just look like rings.