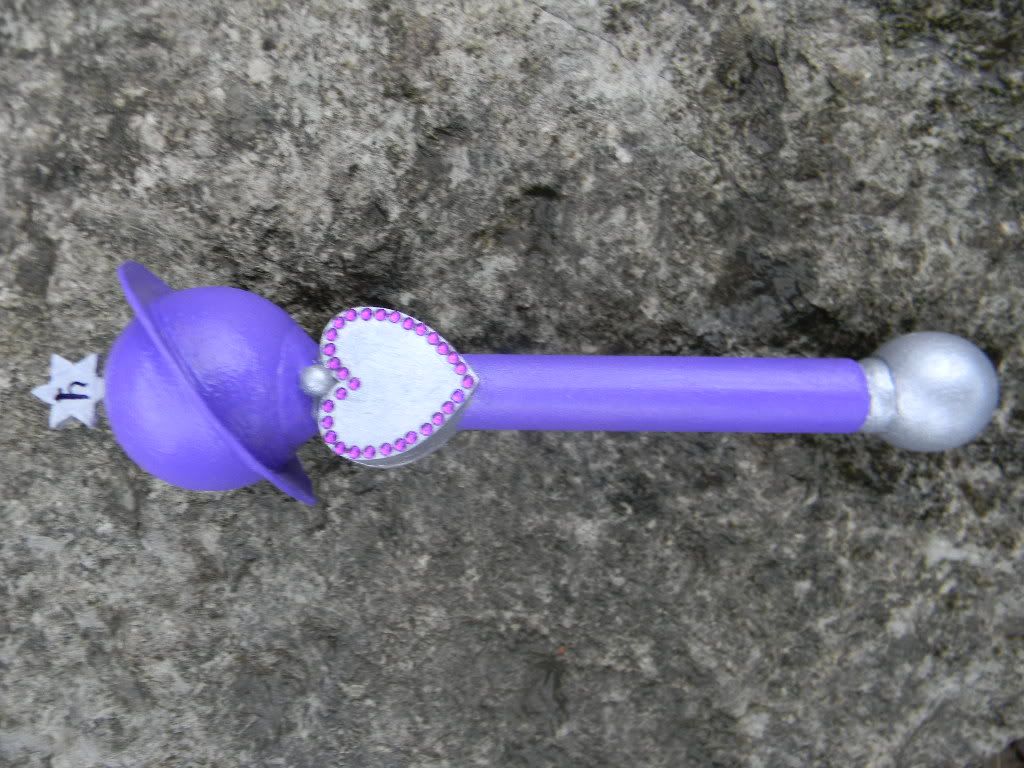
Ever wanted to make a transformation wand? A friend requested this prop and bam, here it is! You can find the video for it here! http://www.youtube.com/watch?v=MOgQGGOCoCg
The materials I used were wood rod balls and hearts, friendly plastic, four 1" Philips head wood screws, 1mm. and 3 mm. PCV sheeting, gray paint, sliver paint, purple paint, nail decorations (rhinestones), and gloss varnish.
The tools I used were a saw, a heat gun, a file, a hot knife, a box cutter, a marker, a circle template, some super glue, some paint brushes, and sponge brushes.
I’ve never made a prop like this before so I tried my best. Instead of crafting a lot of the parts by hand I opted to use a lot of wood bits that were already carved. I purchased some wooden balls and a wooden heart piece for the prop.
Since the balls came with holes already drilled into a section of it, I figured I would use those holes to mount them into the handle. I expanded the holes at the bottom of the balls and then mounted a screw into holes. What I basically did was put a screw into the bottom of the hole before I filled the hole with friendly plastic to hold the screws in place so they wouldn’t move. After that, I drilled holes into the dowel rod and twisted the knobs into the dowel rods to get them on and secure.
At the base of the handle, I used the rasp and file to carve a groove into the dowel rod right above where the ball attaches. I cut and sanded it out as best I could. After that small step, I got a whole mess of friendly plastic and the two wooden hearts I purchased. I started by sticking one heart in place with the friendly plastic and tried to center it as best as I could before I did the same with the other side with the wood heart. I tried to make it parallel as best as I could and left a tiny bit above the sphere to do details.
As a note, it stinks to use filler to do shaping work because it is hard to see. When you paint it filler shows all the problems that you made so you need to make sure you do a perfect job when shaping filler.
After that, I progressed to the ring around Saturn. I used a circle template and figured out how big the size of the ball was and how big I wanted the ring to be. The ring’s total diameter was 3 inches. I took the circle template and drew a circle for the sphere.
On the template it shows how to do a cross and extend it past the circle. You can draw your inner circle and then you can draw an outer circle that lines up correctly with the inner circle and keeps it centered. I cut the circle out of 1 millimeter PVC Sheeting. You can cut this material with scissors. I opted to cut the material with scissors for the outside but I used the hot knife for the inside to make it smoother so it would fit well around the ball it was going around. It is best to use hot knife to cut curves or execute precision work.
When he cut out the circle I cut the inside a little smaller than what I drew it as so that it would be slightly smaller than the ball. This was to ensure a snug fit against the ball. After this was done, I cut a six sided star out of 3 millimeter PVC sheeting. It is hard to shape small pieces of PVC because if you are not careful it can look bad and not uniform. You need to control your cuts because of how the material goes. To counter this, I took the rasp to even it out as best as I could.
The ring was snugly put in place and superglued down to the ball before I stuck the star into place. In After that, I put a glob of friendly plastic into the small hole I drilled and pushed the star in. After that, I made some small putty like balls and stuck them right onto the prop before I painted it purple.
Since I was rushing, I tried to use fabric paint. That was the worst mistake because it gets really blotchy. I ended up sanding it all off and redoing it in acrylic. I based the silver bits with grey paint before I painted the metallic paint on. After that was done, I bought some nail jewels for the rhinestone gems and stuck those onto the heart. The last thing that needed to be done was the small detail on the small star, which I marked with a marker before I varnished the entire thing with a gloss varnish.
That explains this prop! As always, if you have any questions, please feel free to email us at finalcosplaycorps@yahoo.com!

No comments:
Post a Comment