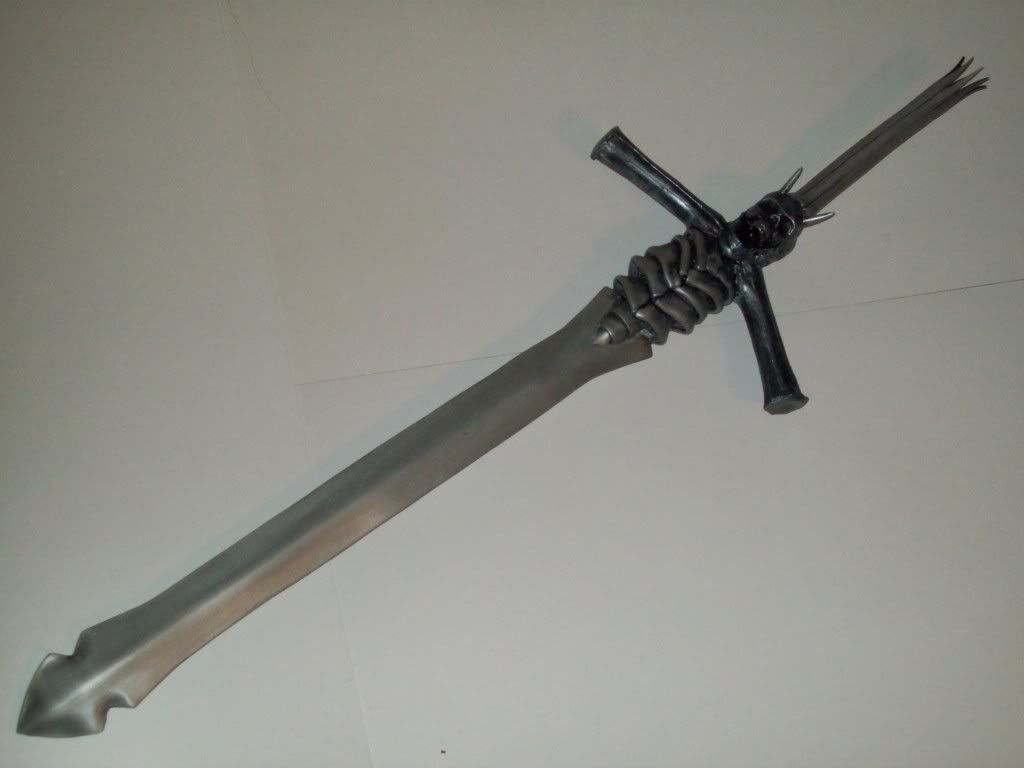
This was an interesting prop that I had made for one of my assistant’s friends.
I used the following materials: 5 inch pcv pipe, 3 millimeter silver acrylic sheeting, IPS Weld on #3, friendly plastic, resin, a carbon fiber rod, EPS foam, plastic skulls, 3M insulation 78, plaster of Paris, white glue, hot glue, #4 half in, 4 inch Philips flat head wood screws, one inch philips flat head wood screws, and black and sliver acrylic paint.
I used the following tools: a hand saw, a hot knife, a heat gun, a yanky push drill, a Philips screwdriver, a rasp, a file, sponge brushes, an 80 grit sanding sponge, a mixing container, some mixing sticks, paper towels, a fine tip marker, and some rulers.
To start off this prop, I began with cutting the silver acrylic. Now, most people probably won’t be using this because it is extremely expensive and rare to find. However, I chose to use this material because of its look. I began by drawing my template onto the plastic. Your sword will differ depending on what sword you’re looking to create and the reference art you have.
In order to create a crisp ridge along the spine of the sword you’ll need to use the hot knife to cut in the middle of the sword before you bend it. The line that you cut into the back of the blade will make a sharper edge. After you make this incision you will need to start heating up the acrylic before you can start to shape the sword before you put these two pieces together to form the sword.
After you have finished molding both sides of the sword pieces you will need to put both pieces together. You should start by taping these pieces in place so that the pieces line up correctly and that they match each other. Slowly use the heat gun to heat up both pieces of the acrylic pvc sheeting while gluing them together with the ips weld on #3 for acyrlics. Be careful with the heat or you may cause the plastic to deform. This process is also very difficult because you need to make sure you seal the entire sword up completely or the resin will leak out.
Note: If you find that you have holes when you pour in your resin you can use some friendly plastic to seal those holes temporarily until the resin hardens. I checked to see if it leaked by testing it with water and plugged all the holes with friendly plastic before I went any farther.
Before you pour the resin in you want to insert something into the blade that reinforces the structure a little more. I used a carbon fiber rod and a long piece of PVC pipe down the length of the sword. This would be reinforced by the resin and allow for more stability and rigidity through the entire prop. After that, I filled the entire sword with resin and allowed it to harden and dry.
While that’s sitting you can focus on the more complicated parts of this prop. I definitely found this to be the ribcage and the arms. I cut EPS foam for all these pieces and used insulation 78 spray to glue them all together. Insulation 78 spray is really easy to use. All you do is spray the pieces that are going to be stuck together, rub the pieces together to make sure that the entire surface is covered, let it sit for a bit so that all sides can get slightly sticky, and then put those pieces all together. After all the pieces are stuck together you can begin to use the rasp and files to cut the basic shape out.
Some people ask about you can manipulate the texture of foam. The texture of your foam differs with how well you sand the foam. Sanding foam is much easier to sand than other materials. For this prop, a more pitted look was more ideal so I left it that way. I made some plaster of Paris to paint onto the foam and fill in details. After the plaster of Paris is dry you can work to sand the plaster of Paris to work on whatever form you want to make.
Now we want to attach the entire piece together. This is EXTREMELY IMPORTANT because you need to make sure the entire prop is well supported throughout the entire piece. If there isn’t good structure there will be no way to do any action with the prop without it breaking so make sure that your prop is structured well throughout. The blade is well structure with the PVC rod, carbon fiber rod, and resin. You will need to make sure the handle and the base are well supported as well.
I chose to attach the chest piece onto the sword before putting anything else onto the blade. I attached this piece with hot glue.
After that, I used the hot knife to cut through the plastic of the blade where the sword arms would be inserted and stuck in before I cut out the section that the handle would be inserted in.
In order to get the skull details on the sword, I used the plaster of Paris to fill the skulls to give them more rigidity and strength. The horns that went onto the sword were made from pieces of PVC sheeting cut into triangles. Lightly heat them with a glue gun before you wrap them into cones.
After these details were done, I used the hot glue gun to mount the arms in place and to attach the skull onto the sword. In order to make sure the skull stayed on the prop I inserted a screw into each skull which also held open the jaw for a more eerie and creepy look. You will need to put filler into the sides of the skulls to make them look nice. White glue and plaster of Paris will get the job done.
After that all that is done it is time to paint the skull section of the prop. I used acrylic paint mixed with plaster of Paris to paint the skulls. The reason I mixed the paint with the plaster of Paris was to ensure that in case the skulls got damaged the paint job wouldn’t matter too much because it would be painted all the way through.
After this it’s time to finish some more minor details for the prop. I made the decorative bits for the handle and the tip of the cone out of foam. It’s much easier to sculpt and shape the detailed bits from foam. After you cut those pieces and finish them you can glue and mount the decorative bits for the handle. Then you can move to cut the grip for the handle from the foam. You can use the same trick for the sword to do the grooves of the handle, cutting in the middle before you cut out the curves. These curves go on the outside and is purely decorative. After that, you cut the triangles out for the spikes.
After all the foam pieces are cut cover all of it in modpodge. This is to give it elastic resistance to cracking. By covering it in modgpodge the prop will take damage and the paint will stretch. I personally used three layers of modpodge on these pieces to make sure that they were fully covered.
After that I primed all the foam and everything else that hadn’t been painted to be painted, using a black paint to cover everything. Don’t forget, priming pieces with paint before you do your paint job is very important! After the black primer coat was dry I began painting the silver. I used a dry brush to brush on the silver paint and dabbed at the prop with the brush so that the prop looked like it was made out of bone and that the dented parts looked more dented.
That is the basic gist of how I made this prop sword! If you’re interested in more details, please check out all the related videos on our youtube, located at http://www.youtube.com/user/FinalCosplayCorps . If you search prop sword you will find our individual videos for that project! As always, if you have any questions, feel free to shoot us an email at finalcosplaycorps@yahoo.com or find us on facebook at https://www.facebook.com/pages/Final-Cosplay-Corps/201702463225417
No comments:
Post a Comment